

A&A MEDIA PRO
ZIP SYSTEM WALL SHEATHING WITH TIM UHLER
A Bilingual Technical Tutorial for the Spanish-Speaking Trade
Project Role: On-Camera Technical Talent (Hands-On), Lead Editor, and Spanish Narrator Production Team: Produced by Fine Homebuilding Location: On-Location Job Site, Pacific Northwest
Production Type: Bilingual Field Tutorial / On-Camera Demonstration + Spanish-Language Narration
Project Overview
This tutorial features framer and longtime Fine Homebuilding contributor Tim Uhler, walking through a full ZIP System sheathing and taping sequence on an exterior wall — built the way working framers actually build it: sheathed flat on the deck before the wall is tilted up into place. Produced early in my time at Fine Homebuilding, this was one of the first pieces built specifically for the brand's Spanish-speaking audience — not a subtitled afterthought, but a from-the-ground-up bilingual deliverable with its own Spanish-language narration and a companion application poster in Spanish.
This project also put me on both sides of the camera. While the Executive Producer ran the primary camera, I worked hands-on alongside Tim, learning his methods in real time — checking the wall for square, running his fastening sequence, marking and cutting window openings, and taping seams — while he corrected my technique as I went. Once the field shoot wrapped, I took ownership of post-production: editing the footage and writing, recording, and integrating a full Spanish-language narration, spoken in first person, that walks the viewer through the install exactly as I experienced learning it from Tim.
The Install Breakdown: A Technical Edit
This is a "learn by doing" tutorial, not a straight demo — the narration follows my own hands-on progression from watching Tim to running the sequence myself. I structured the edit around that same arc so a Spanish-speaking crew gets both the technique and the mistakes to avoid.
1. Squaring the Wall & the Quarter-Inch Fix
Production Focus: Before any panel goes up, Tim checks the wall for square by measuring corner to corner in both directions until the two diagonals match. On this wall we were a quarter-inch out, so I captured Tim correcting it in real time — striking the top corner with a persuader more than an eighth of an inch to true up the frame — followed by a visual sightline check down the top plate against the deck's edge line.
-
Key Detail: Framing this as a real correction rather than a clean take was deliberate — showing the actual out-of-square reading and the fix teaches the diagnostic, not just the ideal outcome.


2. Fastening Setup: Gun Pressure & the First Panel
Production Focus: Tim runs a coil nail gun loaded with 2½-inch ring-shank nails, per local code, and the first thing he dials in is pressure — nail heads have to sit flush with the panel face, never proud, never sunk. I framed close on the gun and the panel face so that flush-vs-overdriven read clearly on camera. The first panel gets squared to the top of the wall, tacked with one nail, then Tim rechecks depth before committing to the rest of the pattern.
-
Key Detail: Capturing Tim's inside-out nailing order — center of panel toward the edges — which keeps pressure from bowing the panel and lets the crew sheathe the whole wall first, then come back for a full nailing pass in one sweep.
3. Panel Layout & the Factory-Built Gap
Production Focus: Each subsequent panel aligns to the top of the wall the same way, but I made sure to get a clean macro shot of the ZIP panel's integrated edge spacer — it builds a factory 1/8-inch gap between panels automatically, which most viewers wouldn't notice unless it's called out directly. Nailing continues inside-out, centered on the stud each time.


4. Marking & Cutting Window Openings — Learning Tim's Method
Production Focus: Once panels covered a rough opening, Tim showed two ways to mark it for cutting later — nails at the edges to relocate the opening once it's hidden under sheathing, or scoring the panel directly with the claw of a hammer. This is where I took over running the sequence myself, flush-nailing a panel inside-out under Tim's direction. At the stud where two sheathing pieces meet, Tim had me angle the nail gun so the fasteners bite into the stud instead of splitting it — a correction worth keeping in the edit rather than cutting around.
-
Key Detail: Because the panel spanned the window opening, we nailed along the sill and header before the opening was ever cut — sequencing that only makes sense once you've seen the whole install in order.
5. Saving Material at the Wall's End
Production Focus: At the end of the wall, instead of splicing in a full sheet the way we had elsewhere, Tim shifted the layout to save material — deliberately leaving two gaps that would later be filled with window cutoff scraps, plus an intentional gap reserved at the wall's end for a final piece that ties into the rest of the building once the wall is standing.

6. Cutting Windows: The Floor-Router Rig
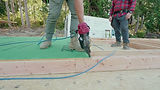
Production Focus: Because the wall was framed flat on the deck, Tim's cutting method is built around that: a wood router rigged to an extended floor-scraper handle, fitted with a 1/4-inch spiral up-cut bit with a pilot bearing that rides the framing as its guide. Cutting clockwise keeps the bit from grabbing. I shot this from a low, wide angle to show why the extended handle matters — it lets Tim cut standing up instead of kneeling and bending over every opening, which adds up over a full wall. I got hands-on with the router myself on the door opening after watching Tim cut a couple of windows.
-
Key Detail: The scraps cut out of the window openings aren't waste — they get matched back into the gaps left in Step 5 and nailed in place.
7. Nailing Pattern for Seismic Zone D2
Production Focus: Before taping, we cleaned the deck and completed a full nailing pass to the local seismic spec: a nail every 6 inches along panel edges and every 12 inches in the field, still with the same 2½-inch ring-shank nails. I made sure to get a clean, countable shot of the spacing itself, since that schedule is the kind of detail a viewer needs to freeze-frame and verify, not just hear described. One small production note worth keeping in the record: Tim is visibly systems-oriented on set, pre-staging coils of nails around the layout before we started so the pace never broke.


8. Taping the Seams: From Wrinkles to Weathertight
Production Focus: The last step in the ZIP System is taping every seam, which is what actually turns the sheathing into an air and weather barrier. Tim starts at the top of the wall on a clean, dust-free surface, keeping tension on the tape to avoid wrinkles, then rolls immediately behind the cut — his roller mounted on an extension pole so he can stay upright and keep moving. I taped a section myself afterward, using the printed placement lines molded into the panel, and the footage is honest about the learning curve: I fought wrinkles at first before finding the rhythm.
-
Key Detail: The technique that actually makes the seam airtight isn't the taping — it's the rolling. Working from the inside out with a working, rocking motion pushes out trapped air bubbles so the adhesive fully reacts and permanently bonds to the ZIP panel surface underneath.
The Spanish-Language Narration
The finished video isn't a dubbed version of an English original — it's built as its own bilingual piece.
My narration runs in first person, past tense, describing what I actually did and learned on-site step by step, while a few short moments of Tim's own on-camera English are preserved intact in the cut rather than replaced, giving the piece two authentic voices instead of a single flattened one.
Fine Homebuilding paired the video with a dedicated Spanish-language application poster on huberwood.com, so the audience gets the same reference material an English-speaking crew would.
Result: A ground-up bilingual technical asset — not a translated one — that gives Fine Homebuilding's Spanish-speaking readership direct, first-person access to Tim Uhler's ZIP System methodology.
Behind The Scenes: On the Deck with Tim Uhler
A look at the flat-framing setup — sheathing and taping the wall while it's still lying on the deck — plus the transition from field shoot to the edit suite for the Spanish narration pass.


Credits & Resources
-
Expert Presenter: Tim Uhler
-
Sponsor/Product: ZIP System, a Huber Engineered Woods brand
-
Publisher: Fine Homebuilding E-Learning
-
Production Team: Fine Homebuilding (On-Camera Talent/Editor/Spanish Narration: Andres Samaniego)
Let's Work
Together
info@aamediapro.com
203-979-7894
CT, NY, MA
Notice: The projects featured here represent the professional portfolio of Andres Samaniego and A&A Media Pro. Certain works were produced in collaboration with or under the employment of third-party organizations (e.g., Fine Homebuilding). All rights to the featured brands and logos belong to their respective owners. No content may be downloaded or repurposed without express written consent.